

Four-Point Lighting for Product Videography
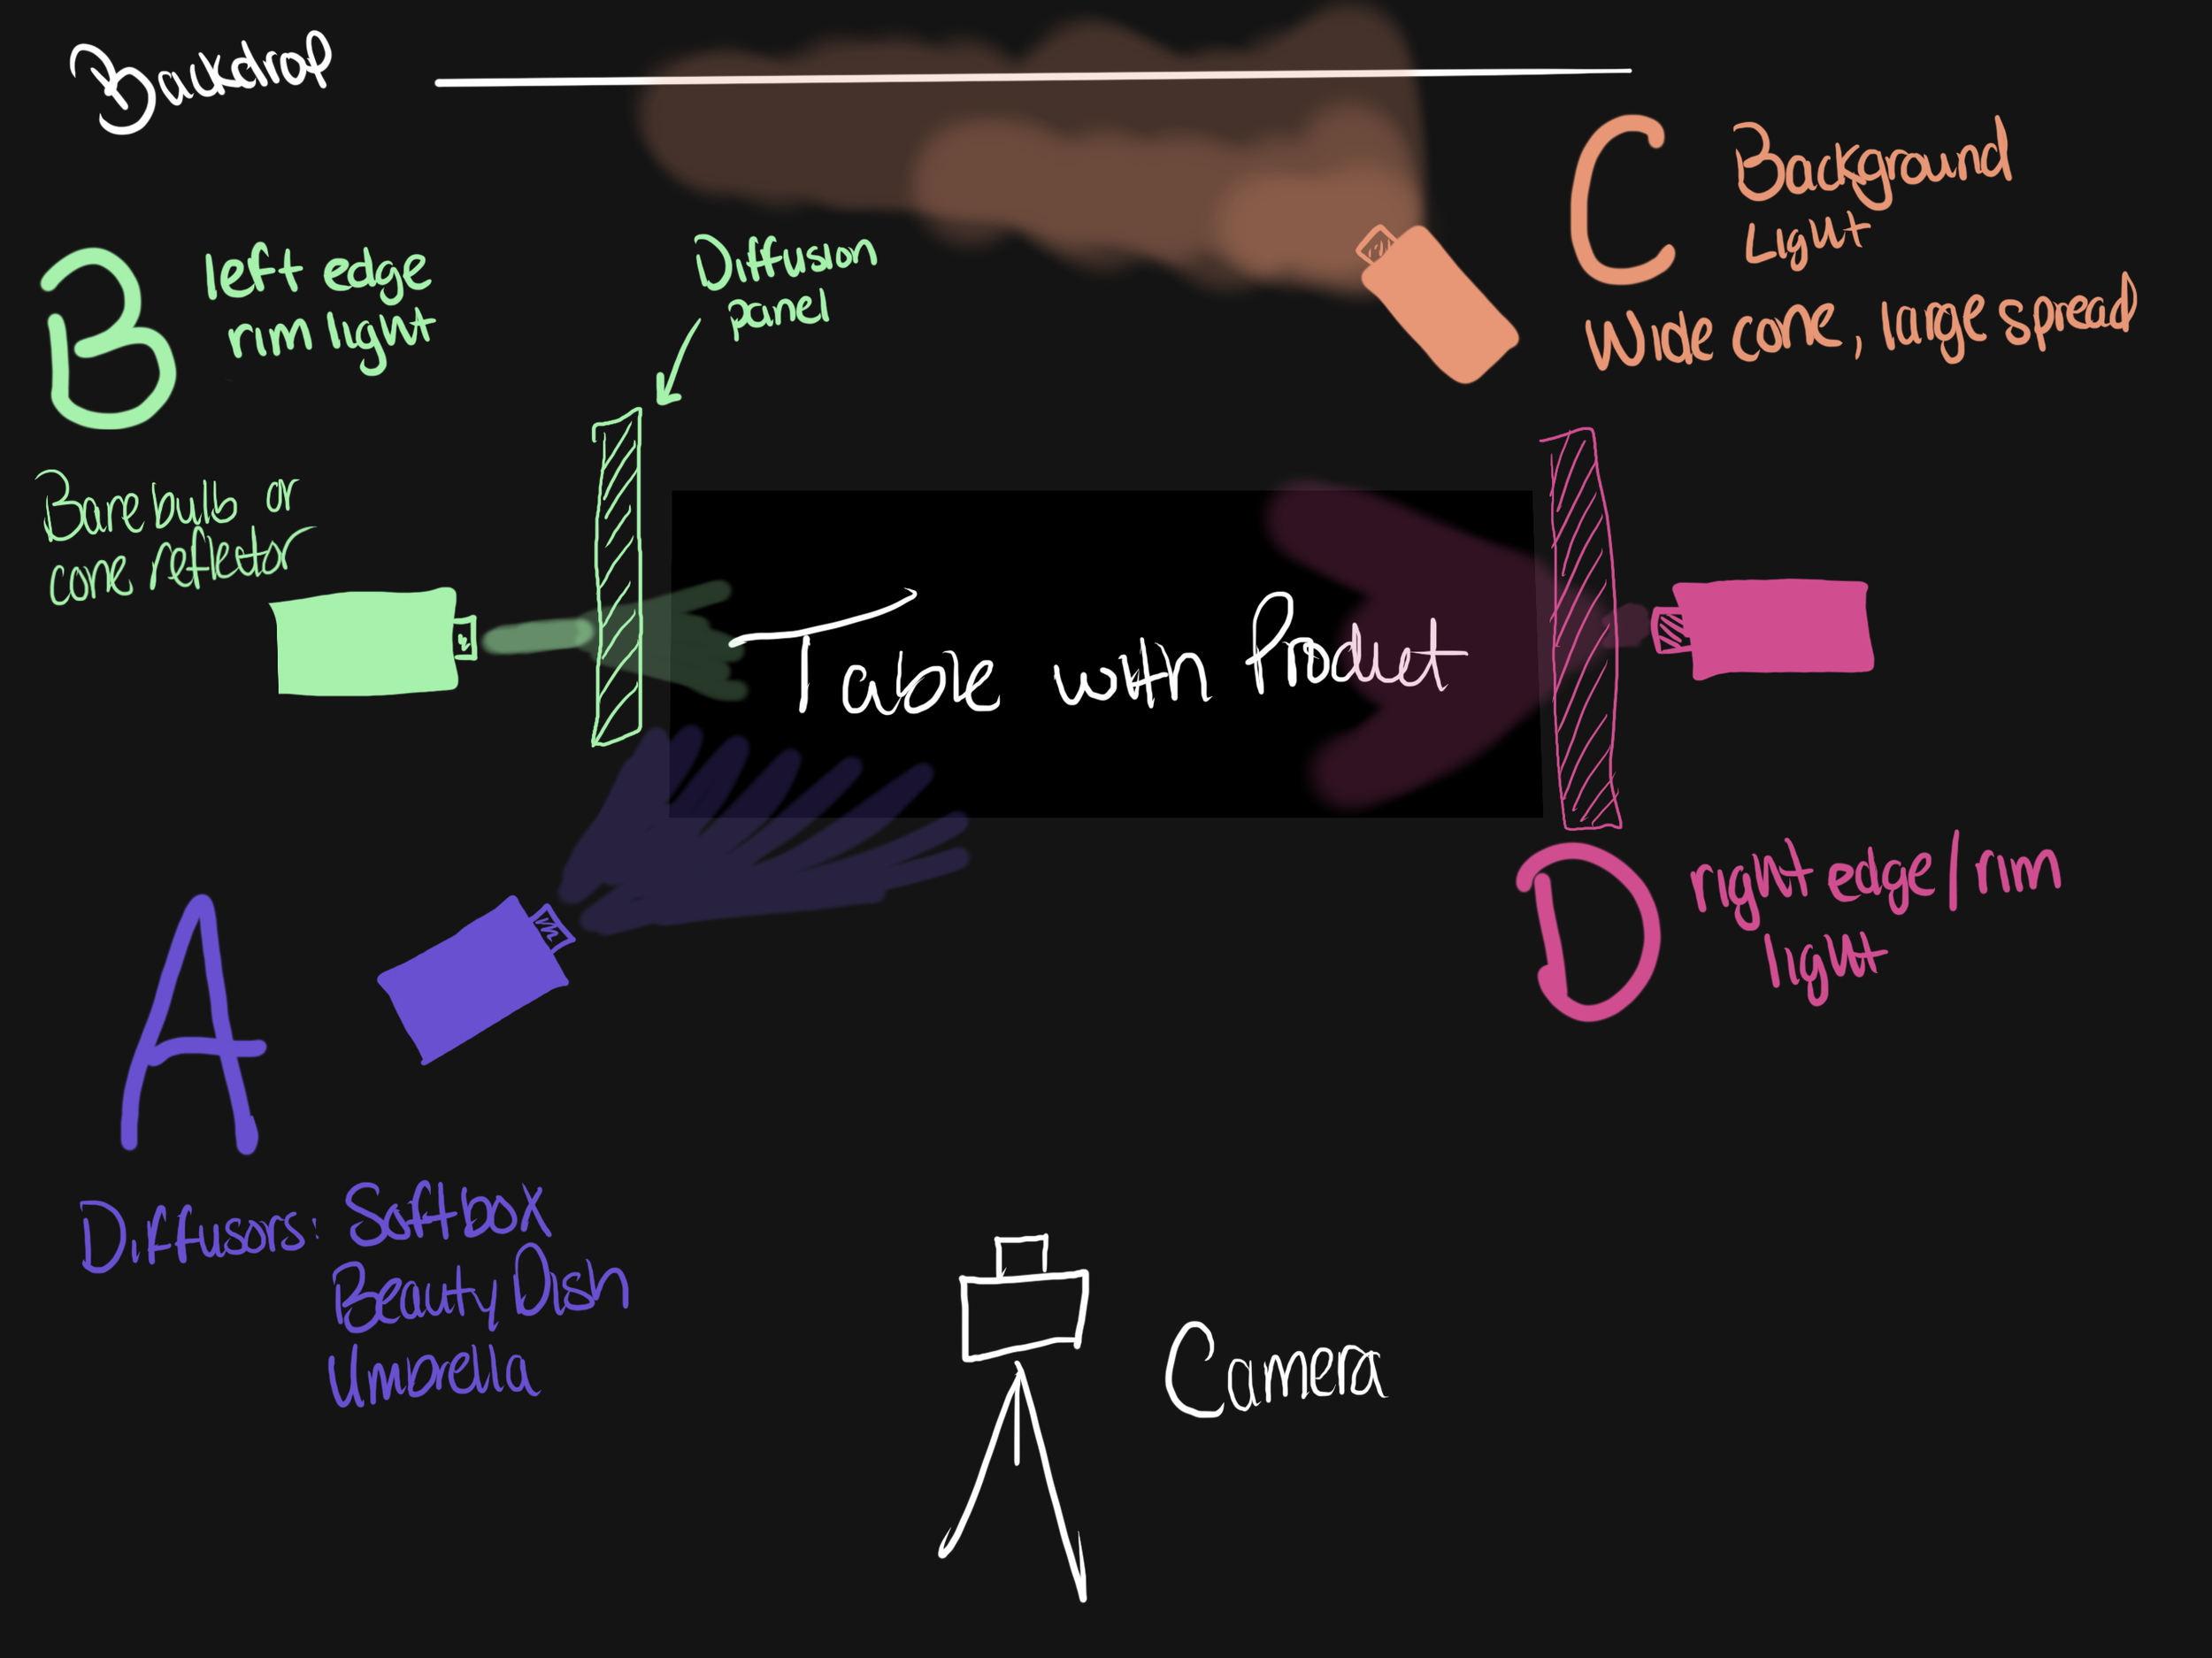
Lighting can make or break a product shot. At WoCo Studios, we often start our shoots with a simple yet powerful four-point lighting system—labeled A, B, C, and D—that creates clean, dimensional images without overcomplicating the setup. Whether you’re shooting a bottle, compact, or tube, this approach gives you control, consistency, and that polished, editorial feel.
The Setup
A — Key Light (Front Light)
Position: Front-left of the product
Diffusion: Softbox, beauty dish, or umbrella
Purpose: Brings the product to life, showing true color and detail without harsh shadows
B — Left Rim Light
Position: Back-left of the product
Modifier: Bare bulb or cone reflector
Purpose: Adds subtle edge highlights to separate the product from the background
C — Background Light
Position: Aimed at the backdrop
Spread: Wide cone for even coverage
Purpose: Lifts and textures the background so it feels intentional, not flat
D — Right Rim Light
Position: Back-right of the product, through a diffusion panel
Purpose: Complements the left rim light, defining shape and adding depth
How to Build the Look
Start with D — Establish a soft backlight on the right edge.
Add B — Balance it out with the left edge light for shape.
Light the backdrop (C) — Add depth and separate the scene.
Finish with A — Fill in the front for clarity and final exposure.